Changing The GMC NV4500
So I was able to finally roll my truck into the shop today. Just getting set up and started is always the hardest part on these projects it seems, but changing the NV4500 transmission in my ’93 GMC 4X4 actually looks like a straightforward process.
You see, the NV4500 was engineered with synchros that required a special gear oil. Many people totally ignore that requirement and just use regular gear oil or try to get away with some other replacement trying to save money. It doesn't work.
It's because of this many transmissions (like mine) have the synchros go out. I drove mine for about 6-7 years with a bad transmission until I could justify the cost to change it. So finally, here we go!
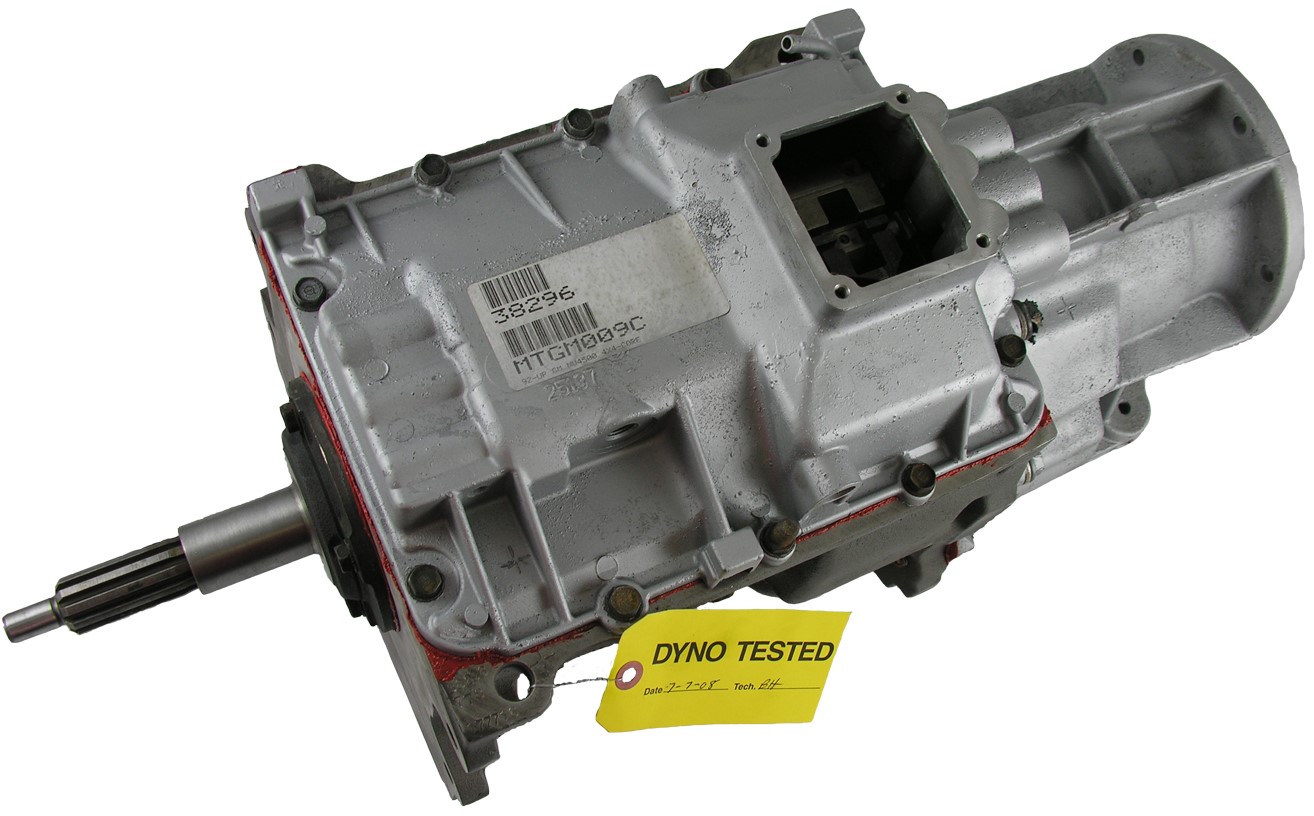 Midwest Transmissions NV4500
As per the Factory manual the steps are essentially to remove or disconnect;
- Shifter
- Oil
- Drive shaft/Transfer case
- Electrical Connections
- Slave cylinder
- Inspection cover
And now you’re ready to… - Support the tranny with a jack
- Remove the crossmember
And - Remove the four bolts from the bellhousing
- Now pull her loose!
Now Let’s Go Through The Details
|
Extra Tools Used: |
Parts: |
Material: |
And of course, things in reality aren’t so simple so we’ll go through the details here.
The first thing in any project is safety. Safety is a numbers game. If you insist on ignoring it, it’ll bite you in the ass sooner or later. And if you are a real do-it-yourselfer like me, it’ll happen sooner. So don’t be stupid, take a few minutes to get set up properly.
The primary safety item is a good, solid set of jack stands. My rig weighs 8200 lbs. fully loaded and fueled so good and solid is a requirement. I did get away with using a standard set of three ton jack stands for a while but I was really pushing my luck. I got away with it by only jacking up one corner at a time, leaving the jack snuggly under and not being under there for very long. But I was still pushing my luck so I finally invested in a monster set of 22 tonners. Yeah 22 tons. Overkill? Overkill is underrated; these things will hold anything I need anytime and anywhere. Like I said, it’s an investment; I’ll never have to buy another set for the rest of my life.
Since I’m working in a temporary shop with a dirt floor (yay me), I put a piece of plywood under the stands to even out the weight a bit.
The Transmission…
After shopping around for several months, I settled on buying from Midwest Transmission Center in Zumbrota, Mn. Although their web site is a little rough, they seemed to really know these transmissions and when I finally called, Dan in tech support backed that up by having all the answers that I needed. Along with that, they dyno test everything, and have a 12 month/unlimited mile warranty.
These days when I need to get something done, I wait until I have the money and then I don’t skimp on quality if at all possible. You really are spending more money in the long run if you buy crap now and have to spend more money on repairs down the road or having to buy it again. Do it right the first time, be patient, save the money and buy quality once. So with that in mind, I wanted to get a new transmission rather than rebuilt.
However, it turns out that new transmissions for my year of truck (1993) weren’t available so I was stuck with the rebuilt unit. This isn’t a bad thing mind you, rebuilt transmissions are put in vehicles every day and can last at least as long as the original. And I could still have...
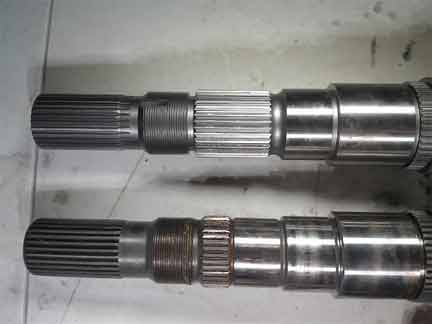
I also looked into the larger main shaft and cryogenics but I had already installed a new clutch from Southbend clutch .
- The clutch has to match the main shaft diameter so I would have had to get a new one. Also, I wanted the better Kevlar clutch from Southbend that’s good for 375 HP and didn’t know how the new one for the new main shaft would perform in comparison. And what about clutch replacement when the time came? It was just too much involved for something that wasn’t really a problem area to begin with.
- As for the cryogenics, I love the idea of bulletproof. When I do a project like this… something that you do that lasts for many years (or should), I want to put the best quality that I can into it. No, I’m not rich by any means, but it’s worth waiting, saving the money and doing it totally right once. So I wanted the strength benefits of cryogenics and Midwest Transmission offers it for their rebuilds but I decided against it for two reasons…
- Cryogenics is for strengthening certain components that are breaking during very high powered use (sled pulls, etc.). What components would I tell them to process? Uhhh, “everything!”
- The NV4500 is a very robust transmission. In both the Dodge and GMC, they hold up very well even under higher horsepower applications. But let’s face it, the 6.5 can get more than enough horsepower and torque to get the job done and have plenty of fun but they aren’t the torque monsters that the new rigs are. And they never will be. (the reasons why are another story) So, like the main shaft above, Cryogenics was a lot of trouble and expense to go through for something that wasn’t a problem area in the first place.
The Tear down
TIP!
The first time doing any job, it’s always a good idea to take plenty of pictures to remind yourself how it all goes back together. Many times a project can sit for a while and it’s amazing at what little things you can forget in that time.
Detailing the factory steps above…
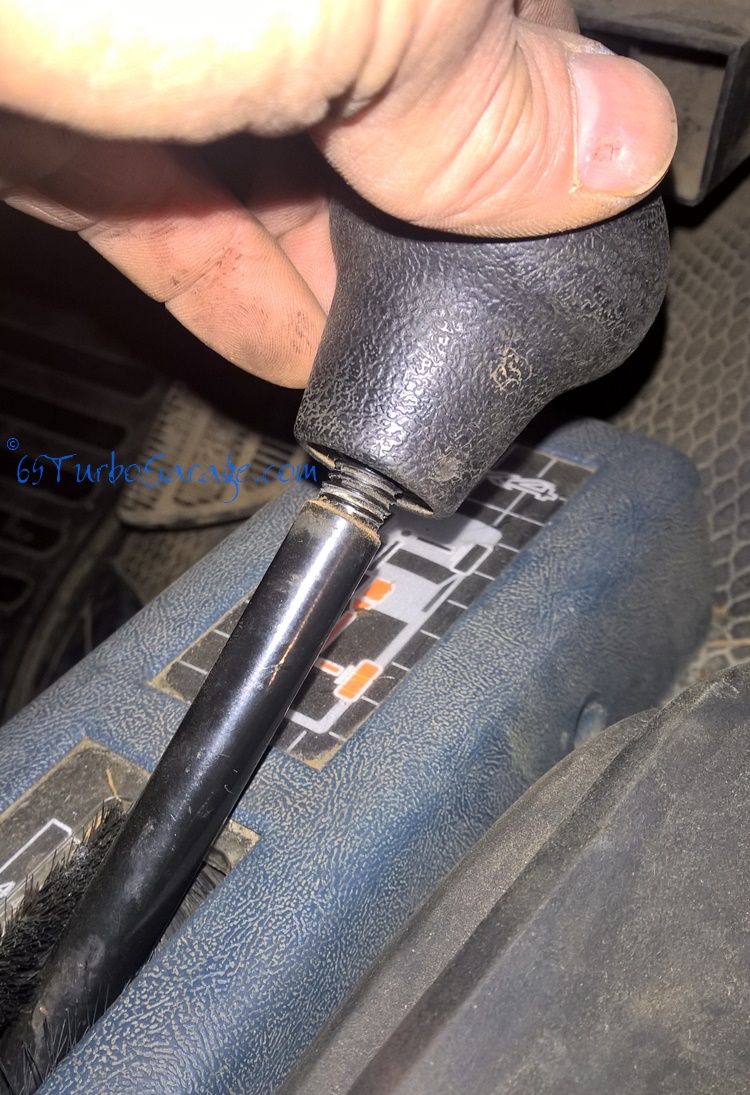
- I started by removing the shifter. The manual shows it having a lock nut at the base but mine didn’t, it just screwed off by hand. I normally like to put things back to as factory as possible but in this case, it was tight and had worked perfectly so I’ll just screw it back on like it was when I’m done.
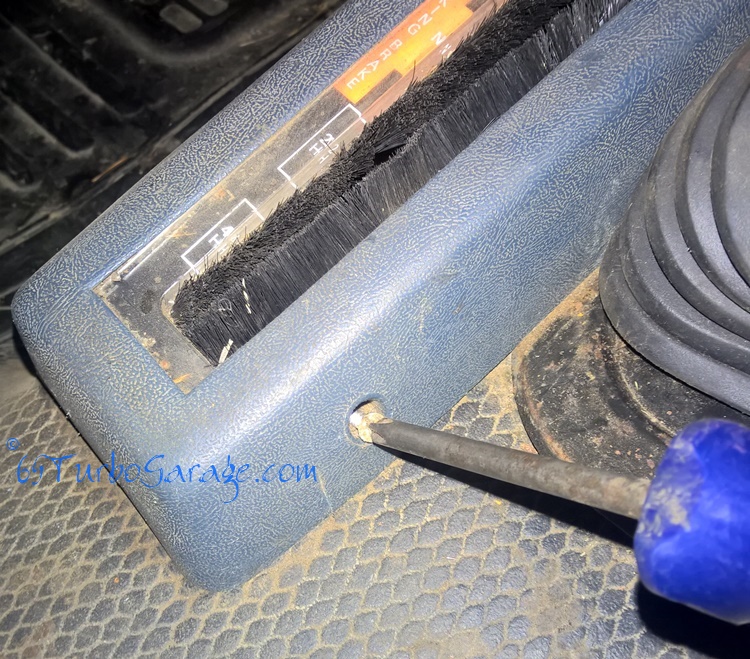
2. I removed the transfer case shifter cover for two reasons…
- It makes it easier to get the shifter boot retainer off
- While I’m in a project, I try to take care of all the little things that need fixing while I’m in there. In this case it was just the bulbs that light up showing that the 4X is active. They are just little 194 bulbs that come out with a tug so are very easy to get working. I want to try the newer 194 LEDs at some point too. Way brighter, less heat and less current draw.
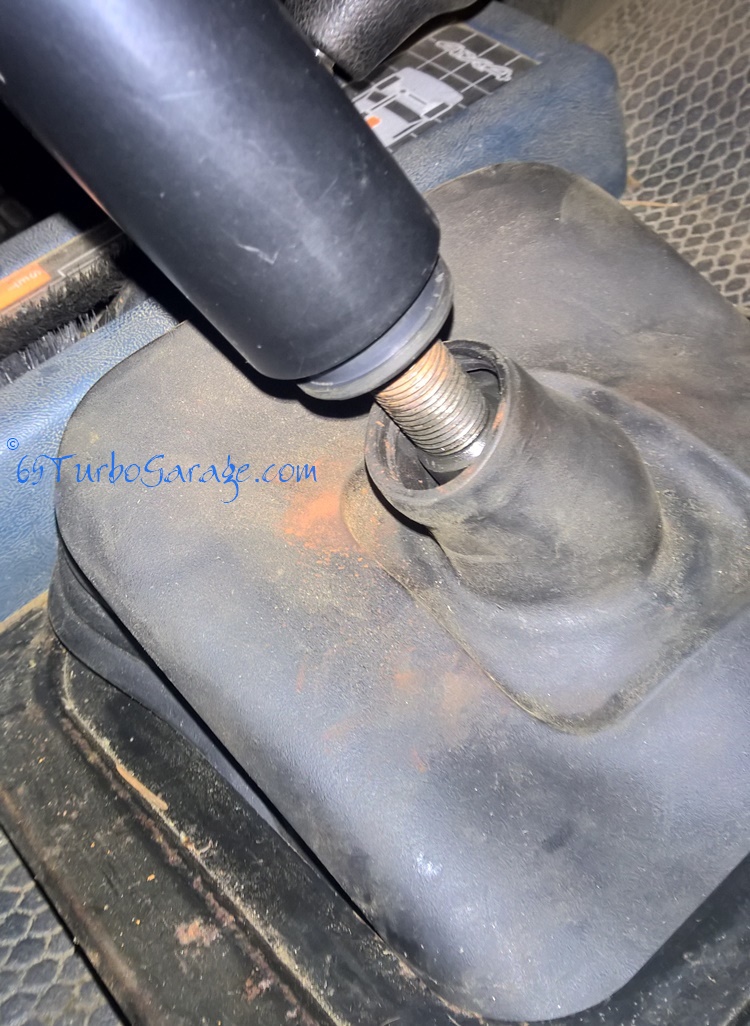
Unscrew the shifter knob and then it’s only four Philips head screws on the cover, so it comes off easily and you’ll want to vacuum it out down there too, trust me.
3. Set the cover aside, lift the bottom lip of the shifter boot and remove the four Phillips head screws holding the retainer on and pull the retainer off
4. Remove the four screws holding the boot on and pull the boot and two gaskets off
5. Using two screwdrivers, push down on the collar around the shifter stub while turning to pop it out. Here's a video that makes it pretty clear...
Now, down below…
- Remove the four 11mm bolts from the u-joint straps at the rear drive shaft. I pulled the two bolts holding the carrier bearing off to allow the drive shaft to move out of the way
- Remove the electrical connections going into the transfer case while you’re there
- Remove the four bolts holding the front driveshaft to the transfer case
- Remove all four nuts from the transmission mount.
- Jack up transmission and remove mount
- Slide a 3’ 2x4 on top of torsion bars right where mount was and lower the transmission onto the 2x4 (I also used another 2x4 about 12”-18” long between the long 2x4 and the tranny)
Now you’re ready to pull the transfer case loose.
- Remove the five bolts (15mm or 5/8) that you can get to easily (all the lowest ones)
- Support the transfer case with your jack
The last bolt can be a bear but as always, with the right tools, you can get it much easier. An S wrench will get up in there just fine (I went in from the passenger side). But a Gear Wrench S is just the ticket for difficult to reach places. Two wrenches for $17.50 (2016) is nothing to make a job this easy! - Remove the last bolt
- The weight of the transfer case should break the seal loose as you lower your jack a bit. Push the transfer case back until you disengage the splines from the transmission
- Slowly lower the transfer case. This got a little hairy for me so having an extra set of hands to help out would make it a breeze.
Now that you have it sitting on the ground, you can go ahead and clean the gasket off of there with a scraper and wipe it down with some brake cleaner. And you’ll want to put a new gasket on there.
Now Let’s Pull The Transmission Loose
The transmission should be resting on the 2x4s and held in by only the four bolts on the bell housing. If you can get to the six bolts holding the bell housing to the engine, then do that but I can’t get to the two top ones without a LOT of trouble so I just went ahead and pulled the transmission from the bell housing.
- Support the transmission with your jack
- Remove the four bolts holding the transmission to the bell housing
- Pull the transmission loose
It came out pretty easy for me by pushing the transmission back until the shift housing almost hit the floor sheet metal, then dropped my jack just enough for the housing to clear. You want to drop it as little as possible because the input shaft is still in the engine and clutch. Dropping it too much will put too much pressure on the clutch and possibly break something.
Keep pushing back and dropping until it’s free of the clutch and then you can lower away.
There you go, a transmission at your feet!
Now the six bolts holding the bell housing to the motor can be reached. A few of them are a bolt/stud operation and the first is a 13mm nut, so take that and anything it’s holding off, then the next is 14mm to pull the bolt itself out.
The bell housing may be on pretty snug so just keep working it back and forth. Maybe take a rubber mallet to the lower part but you don’t want to pry it with a screwdriver or anything.
Always Inspect Things As You Go
Keep in mind that this is not an area of your truck that gets frequent attention. So, you want to check everything to make sure that it’s in good shape so you won’t have to get back in here!
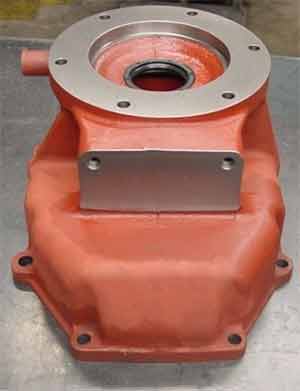
In my case, the previous mechanic had done some real shoddy work. I had a broken ball stud (clutch pivot ball), a missing inspection cover which meant that the hardware for the ball stud was gone and they’re not available anymore (let me know if you have a good source) and it looks like he installed a used or at least very crappy quality throwout bearing.
So check all that…
- Take the clip (mine had nuts) off of the ball stud, remove the bushing and set them aside
- Slide the clutch fork off and clean it up real good. I use a sonic cleaner with some degreaser, it works great! Take a real good look at it under bright light. Make sure it’s not worn excessively and that there are no cracks. It’s actually a pretty cheap part, so if it’s been on the vehicle for a while (and it probably has been) then just replace it.
- It’s the same with the ball stud. If it’s been there a while then it’s likely pretty worn so just replace it. An Allen socket on the back of the bell housing will turn it right out.
- Unless you know it is pretty brand new, and it looks flawless, I would replace the throwout bearing. All this work should last you many years but if you put in a crappy bearing, you'll be in it to do it again.
Reassembly and install
O.K. so you have your new ball stud installed. Even though it can’t back out because it’s trapped in there, I still used a little blue lock tight to keep it secured.
Slobber some grease on the ball end and slide the fork onto it, grease the bushing too and slide it on the clip. If you use nuts like mine, you want to just get the first one down snug and then work the fork through its full range of motion. You can’t have anything binding up. When it’s snug but free, thread the second nut on to lock it down. Use two wrenches to lock them together without snugging them down on the fork any more. Flip the bell housing to look at the bottom, there is a grease fitting down in a cubby hole there. Pack some grease in to get the ball stud filled up. And remember that thing is there, you’ll want to push some grease in every now and then to keep your clutch ball from wearing out.
Most people don’t even know that it’s there and let their clutch system wear out before it has to.
The next step has a small but very important detail that is easy to get wrong.
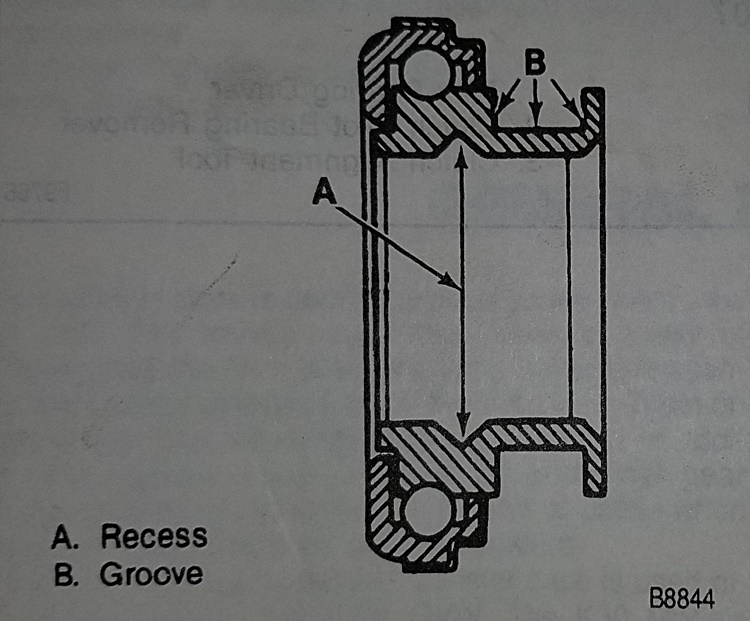
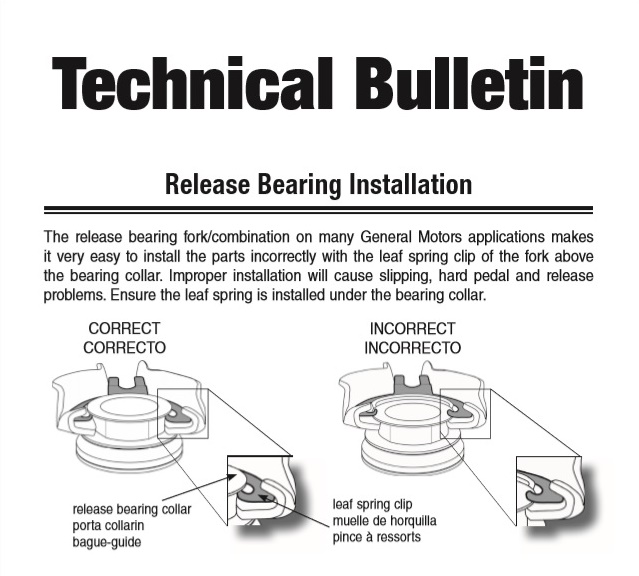
Installation of the throw out bearing has been done wrong so often that they made a technical bulletin to show the proper way to install. The manual says to pack the inside groove and the groove where the fork sits with grease but it sure makes me nervous to have all the grease in there where it can spin off and get on my new Kevlar clutch so I just slobbered a bunch grease in the groove marked “A” here but then a just little where the fork sits marked “B”. And I coated the output shaft collar on the tranny where the bearing will ride and called it good.
So get that done and install the bearing on the fork thusly…
It makes sense when you see it all together.
At this point the manual shows to install the same way we took it out, by installing the bell housing first and then the transmission. And while that would make getting to the bolts easier, I couldn’t for the life of me get everything to line up properly because my version of the NV4500 doesn’t have the bolt on shifter hole so it interfered with the sheet metal and didn’t allow me to level out the input shaft enough to slide it in. So I bolted the bell housing up to the transmission and worked it in that way.
Grab that poor sucker that you’ve been using as extra hands to help you out and start working it up, bell housing first.
Take it slow and easy. Keep an eye on the shifter housing and try not to beat up your sheet metal.
Push, wiggle, lift, repeat.
Sometimes a combo of all three.
Before you squeeze it all the way in, grab your reverse light plug, reach up and plug it in now. It’s a real bugger to do it after. It’s the one all the way up by the shifter hole.
Now button her up!
Great! She’s up and in, now start the fun process of getting all the mounting bolts in and torqued down.
Put a little grease on the end of the rod and work the slave cylinder back into it’s hole. There is an inspection bolt right there in the side of the bell housing, remove that and get a good look in there at the fork so you can make sure the rod is seated into the dimple correctly.
Now just put everything back the way it was (hopefully you took my advice and took plenty of pictures).
The last step is one of the most important, pour in your gear oil. It takes 4 quarts of Castrol Syntorq GL-4 synthetic oil. You probably can’t get the Castrol any more as it was discontinued long ago but Redline has a direct replacement for it that keeps our syncros alive.
Important!
A word on the gear oil for these things. Don’t use regular gear oil! You’ll pretty much guarantee the destruction of your syncros. You need to use the synthetic oil. Yes, it’s expensive, yes it’s hard to find sometimes, but you don’t change it that often (maybe never) so it’s pretty much a one-time cost for most of us. Don’t skimp here, get the right stuff.
Before lowering it down, jump in and run it through the gears a few times to make sure that nothing is bound up. Start it up and do it again.
TIP!
One little thing to look out for is that the transfer case can easily be bumped into neutral and make you poop yourself thinking something major is wrong. So double check that it is in gear.
